"To see what few have seen, you must go where few have gone."
-The Buddha

Welcome to Todd's only official website. Here you'll be able to find all the latest News, Books, Reiki, Blog & all things Todd.


Reiki Healing / 霊気


Todd's only official home on the web © 2005 - 2011 Todd Jay Leonard / ONO Creative Design. All Rights Reserved


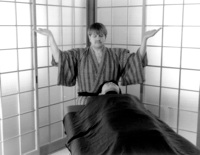
1) Bring in the Reiki energy by stating your intention to channel a healing for the person you are treating. “I offer (name of the person) love and healing through the Universal Life Force Energy of Reiki.”
It is important to cover your client with a light covering. Even though the person may not think it is necessary, by the end of the treatment s/he will be chilled. Although the practitioner’s hands and body heats up during a treatment, the recipient’s body temperature lowers due to the intense relaxation that a treatment offers to the person receiving it.
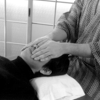
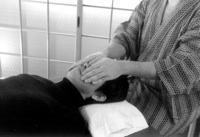
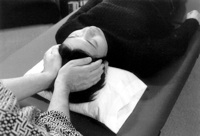
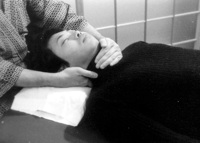
2) EYES: Cup the hands gently over the eyes. It is a good idea to fold a tissue in-half and put it under your hands. The eyes are sensitive and some people may not be comfortable with you touching their eyes.
Also, upon first entering the person’s aura, it is best to slice into the energy field slowly and gently; coming down with the hands flat will push upon the energy field and can surprise the client. Gently slice your way into the energy field before placing your hands in this position.
This position helps to heal sinus blockages, hay fever, headaches, toothaches, and serves to balance the pituitary gland.
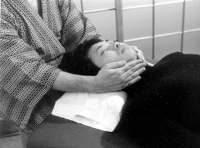
A close-up view of the hand position on the eyes.
3) EARS: Cup the hands over the ears; after a few minutes pull away slightly and return to the prior position.
This position is good for high blood pressure, balance, and mental clarity.
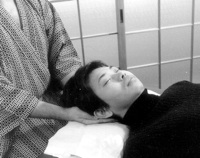
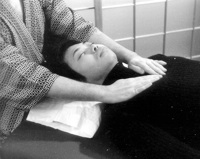
4) TOP OF HEAD: With both hands on each side, gently cup the top of the head allowing your palms to touch slightly.
This position assists with mental clarity, headaches, and
A view from a slightly different angle of this hand position.
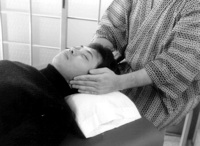
5) BACK OF HEAD: Gently cradle the head in both your hands, with the fingers resting under the occipital ridge.
This position helps to release past hurts and memories, worry, and insomnia.
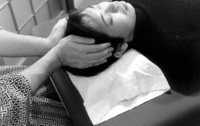
6) THROAT AND BACK OF NECK: Gently place your left hand under the back of the neck and place your right hand cupped around the front of the throat.
This position is good for treating the thyroid and parathyroid glands, larynx, vocal cords, and lymph nodes.
7) THROAT/NECK: Gently cup your hands on each side of the neck, over the throat.
This position is good for metabolic disorders, weight problems, heart palpitations, sore throat, tonsillitis, flu, and hoarseness.
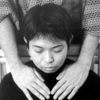
8) SHOULDERS: Gently place hands on each side of the head, keeping the fingers of each hand together
This position is good for aiding in the release of burdens, guilt, and the help relieve symptoms associated with the thyroid and parathyroid glands, larynx, vocal cords, and lymph nodes.
9) HEART / “T” POSITION: Gently place the left hand on the upper part of the chest, and with the right hand make a “T” without touching the body. [Of course, if the person is very familiar with you and you have no problem touching the person in this sensitive place, then by all means you may. Generally, though, with a client it is best not to touch areas like the breasts of women and the area around the sex organs on both men and women.]
This position is good for the heart, lungs, respiratory system, and thymus gland.
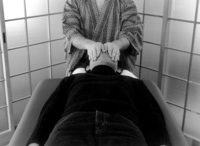
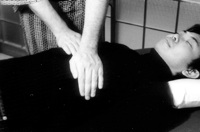
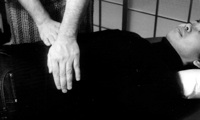
10) MIDDLE CHEST/STOMACH: Starting from the prior position, methodically move your hands down the chest and stomach are of the client.
These hand positions are good for digestion, the spleen (left side), pancreas (middle) and liver/gallbladder (right side). For emotional healing from shock, place one hand on the spleen and the other intuitively.
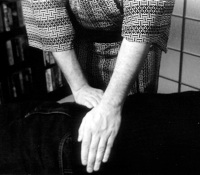
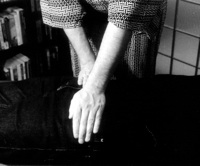
11) PELVIS & HIPS: The first picture is the “V” position. For men, place your hands in the groin area without touching the male organ; for women, lay both hands over the pubic bone.
Both of these hand positions are good for the organs of reproduction, abdominal organs, intestines, bladder, and urethra. Also, it assists in menstrual and menopausal disorders, appendix and digestive disorders (cramps, back pains, ovarian tumors, uterus, bladder and prostrate problems).
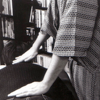
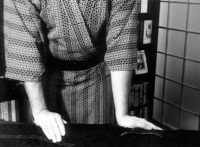
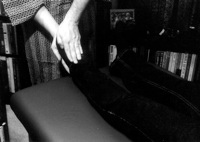
12) LEGS: The arms and legs can be treated on either the font or back side of the body. I usually place one hand on the client’s shoulder, and the other hand on the client’s hand to form a conduit of energy passing through the entire arm. From the shoulder, I then move that hand to the client’s elbow which usually draws a lot of energy in most people due to the over use in modern society of these joints.
For the client’s legs, I employ a similar technique. I place one hand on the hip bone and the other hand on the knee. I then replace the hand from the hip onto the thigh and work my way down, then switch the hands, placing the free hand on the ankle of the client. I then move my hand on the knee down the leg until the hands are side by side. I do this for each arm and each leg.
These hand positions are good for anyone who must use their arms and legs extensively in their work. Waitresses/waiters, computer operators, construction workers, laborers, etc. People who must stand on their feet for long periods, and people who use their hands and arms in repetitive motions, benefit focusing the Reiki on these body parts.
13) FEET: Again, feet usually love Reiki energy and they draw much energy during this hand position. You can hold the feet with both hands, individually, or put one hand on each foot. Using the hand charka to the sole of the foot is a powerful hand position because of the conduit of energy that is made in this position between you and the client. Finishing with the feet on the front side helps to ground the person.
Before Beginning a Reiki Treatment:
Both the practitioner and client should remove watches and all jewelry.
The receiver should remove his/her shoes, belts and loosen tight clothing.
The practitioner should cleanse the area with the First Symbol and charge the room with positive energy.
The practitioner should relax and center him/herself before starting the treatment.
The practitioner must wash his/her hands in cold running water before and after the treatment.
The receiver should keep his/her legs uncrossed.
The practitioner should clear the space before the client arrives, and create a meditative atmosphere conducive to healing.
Give the treatment in silence; no chit-chat or talking in order to allow the client to relax completely.
Cover the client with a light blanket, like a beach towel or sarong.
Always remind yourself before and afterward that you are being used as a channel for healing energy.
Afterward, smooth the client’s aura three times and draw an energy line from the coccyx up over the head.
Allow the recipient to come back to the present slowly after the treatment; allow the person to rest for as long as they need to before getting up.
-Adapted from “The Power of Reiki: An Ancient Hands-on Healing Technique,” by Tanmaya Honervogt (New York: Henry Holt & Co., 1998)


* Before asking the client to turn over on his/her stomach, I always comb the aura—starting from above the head and sweeping down past the feet—three times. This helps to clear away any negative energy that has risen up during the treatment. Also, it helps to smooth out the energy field of the person before starting the Reiki treatment on the backside.
*The treatment continues on the back side of the client to reinforce the healing received from the front side. The Reiki energy is a smart energy that intuitively goes to the area it is most needed, but by doing both the front and back sides it assures that the Reiki energy is evenly distributed during the treatment. Intuitively, the practitioner can sense energetically which areas need additional energy by scanning the client during the treatment.